We LOVE this DIY needle felting project!
Every now and then, I have to face the harsh reality that I am a craft supply hoarder. If it wasn’t for my bestie Viv talking me out of things that I thought about “trying” over the years (most recently quilting), I would be the proud owner of more storage space than what Tori Spelling needs to store her 90210 memorabilia. No thanks.
Despite Viv’s help in getting me to dial it back over the years, I’ve still ended up with a crap ton of stuff that I “buy and try” and then quickly forget about for something new. Normally I would consider it a bad thing that “Hoarders, Buried Alive” could film an entire season based on my craft woes, but not today! Because today, my friends, I found my needle felting supplies!
And now I’m here to convince you that you NEED needle felting supplies, too. My tutorial uses a lightweight sweater appropriate for summer, and Viv embellished a stretch jersey hoodie. However, you can do this on any knit/jersey textile, so it’s a great project any time of year. Read on to see the details.
-Jen
Viv and I were originally inspired to try needle felting after reading this post.
With a slight spin on things, we created our own DIY felted sweater patches and had a blast doing it and so can you!
MATERIALS:
- A sweater you don’t love in case you mess up, which you won’t , but just in case
- Wool or acrylic work best.
- A cookie cutter (it acts as a pattern and guide)
- Wool roving
- 36 gauge felting needle
- KEEP ALL SHARP OBJECTS AWAY FROM CHILDREN
- A piece of dense foam a little bigger than your project.
- An iron on “wool” setting
- DO NOT IRON NEAR CHILDREN OR LEAVE AN IRON WHERE A CHILD CAN GET TO IT. IRONS GET HOT & ARE HEAVY!
DIRECTIONS:

Step 1: Choose your colors. (Notice how I chose pink?)

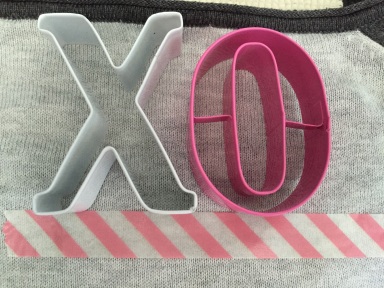
Step 2: Lay out your design and mark the area with a piece of tape (the tape acts as your guide).
Step 3: Place the foam block under the area you plan to felt.
Step:4: Align your cookie cutters with the tape.

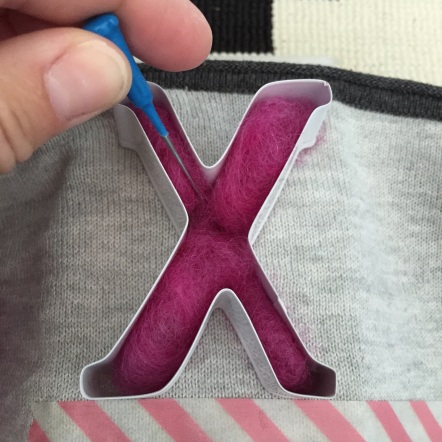
Step 5: Pull pieces of wool roving from the roll and place it evenly inside your cookie cutter, making sure to fill all areas of it.
Step 6: Continuously poke the wool roving until it all gets tangled in the sweater fibers and flattens out. It will look patchy, but this will be remedied in steps 8 & 9. & yes…this step is extremely therapeutic.
In fact it’s so therapeutic that you may get a little overzealous with the “poking” in which case you may break a needle.

Sigh. To avoid this, make sure to move your needle straight up and down as you poke it into your project…and maybe go running before you start.
Continue the above steps until you have successfully “felted” all parts of your design. You’ll repeat this process until you are happy with the felt coverage, which means that you should see your roving lie flat and appear tangled within the sweater fibers.
WARNING: Felting needles have tiny, razor-like structures on the tip and are VERY sharp, so use caution!!!
Step 7: Carefully remove your project from the foam block. You’ll notice the tufts of wool fiber poking through the other side. That’s a good thing!

Step 8: Dampen your felt patch with water (you can use the spray feature on your iron or lay a damp papertowel over the project and press to dampen, like I chose to do).

Step 9: Place the hot iron on your felt patch and hold it there until the patch is nice and smooth.


(You’ll notice in the photo above (right), the “X” has a bald patch. That’s no problem! Just repeat the steps above until you get the desired look. Errrrr…I couldn’t fix the bald patch because if you remember, I broke my needle, and it was the last one I had. Double sigh.)
Step 10: Rock your new DIY felt sweater patch like you just won Project Runway!

This is a project that is not only simple and fun, but it also gives you an opportunity to adorn an otherwise boring article of clothing, which is exactly why WE LOVE THIS STUFF!


Nice work!
LikeLike
Brilliant work! Looks lovely x
LikeLike
I 💗 needle felting. I have used my cousins set. I think I need to get my own… 😉
LikeLike